Startseite >
In this article, you’ll discover how to automatically assign Contacts coming from Click-to-Chat (CTC) Ads to Agents.
To streamline the process of transitioning Contacts coming from CTC Ads to skilled Agents, it is essential to focus on responding to their queries in a timely and efficient manner. This can be achieved seamlessly using the Click to Chat Ads: Assignment Workflow Template.
For businesses that want to assign conversations coming from CTC Ads to AI Agents instead of agents, refer to this article.
Seamlessly transition Contacts to agents to:
Minimize delays, automatically streamline Contacts from CTC Ads to agents .
Allow Contacts to experience quick and efficient handling of inquiries, leading to higher satisfaction and potentially, increased Contacts loyalty.
To use the Click to Chat Ads: Assignment workflow template, click + Add Workflow > Click to Chat Ads: Assignment > Click Use Template in the Workflows module.
Trigger: The Workflow starts when a conversation is opened via a Click-to-Chat (CTC) Ad.
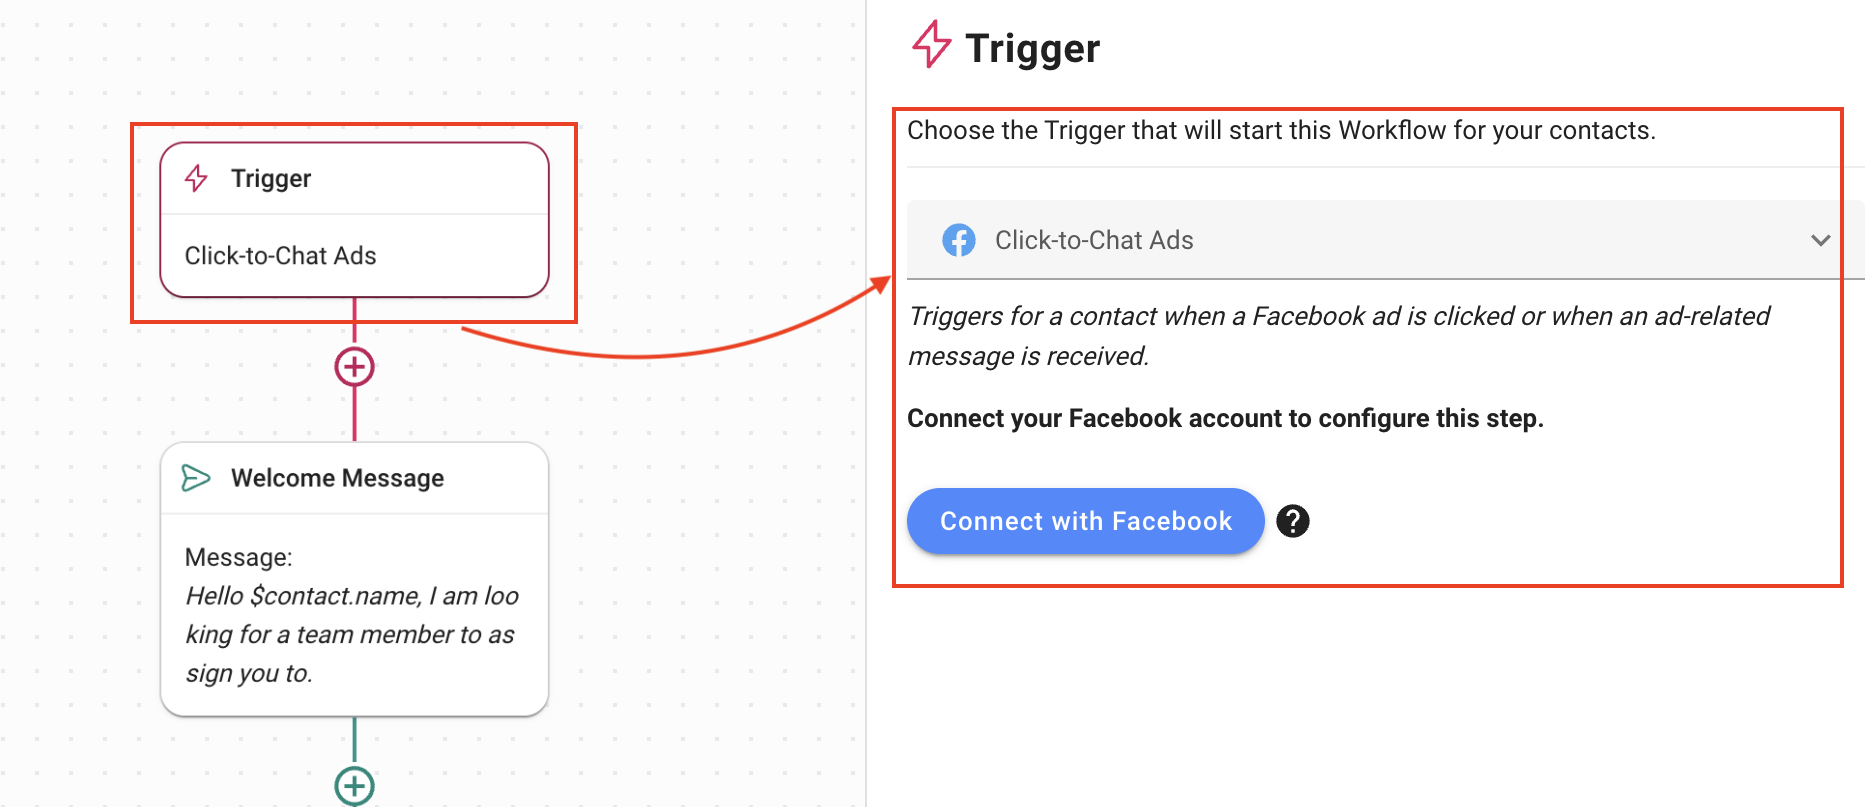
You can learn more about the Click to Chat Ads trigger here.
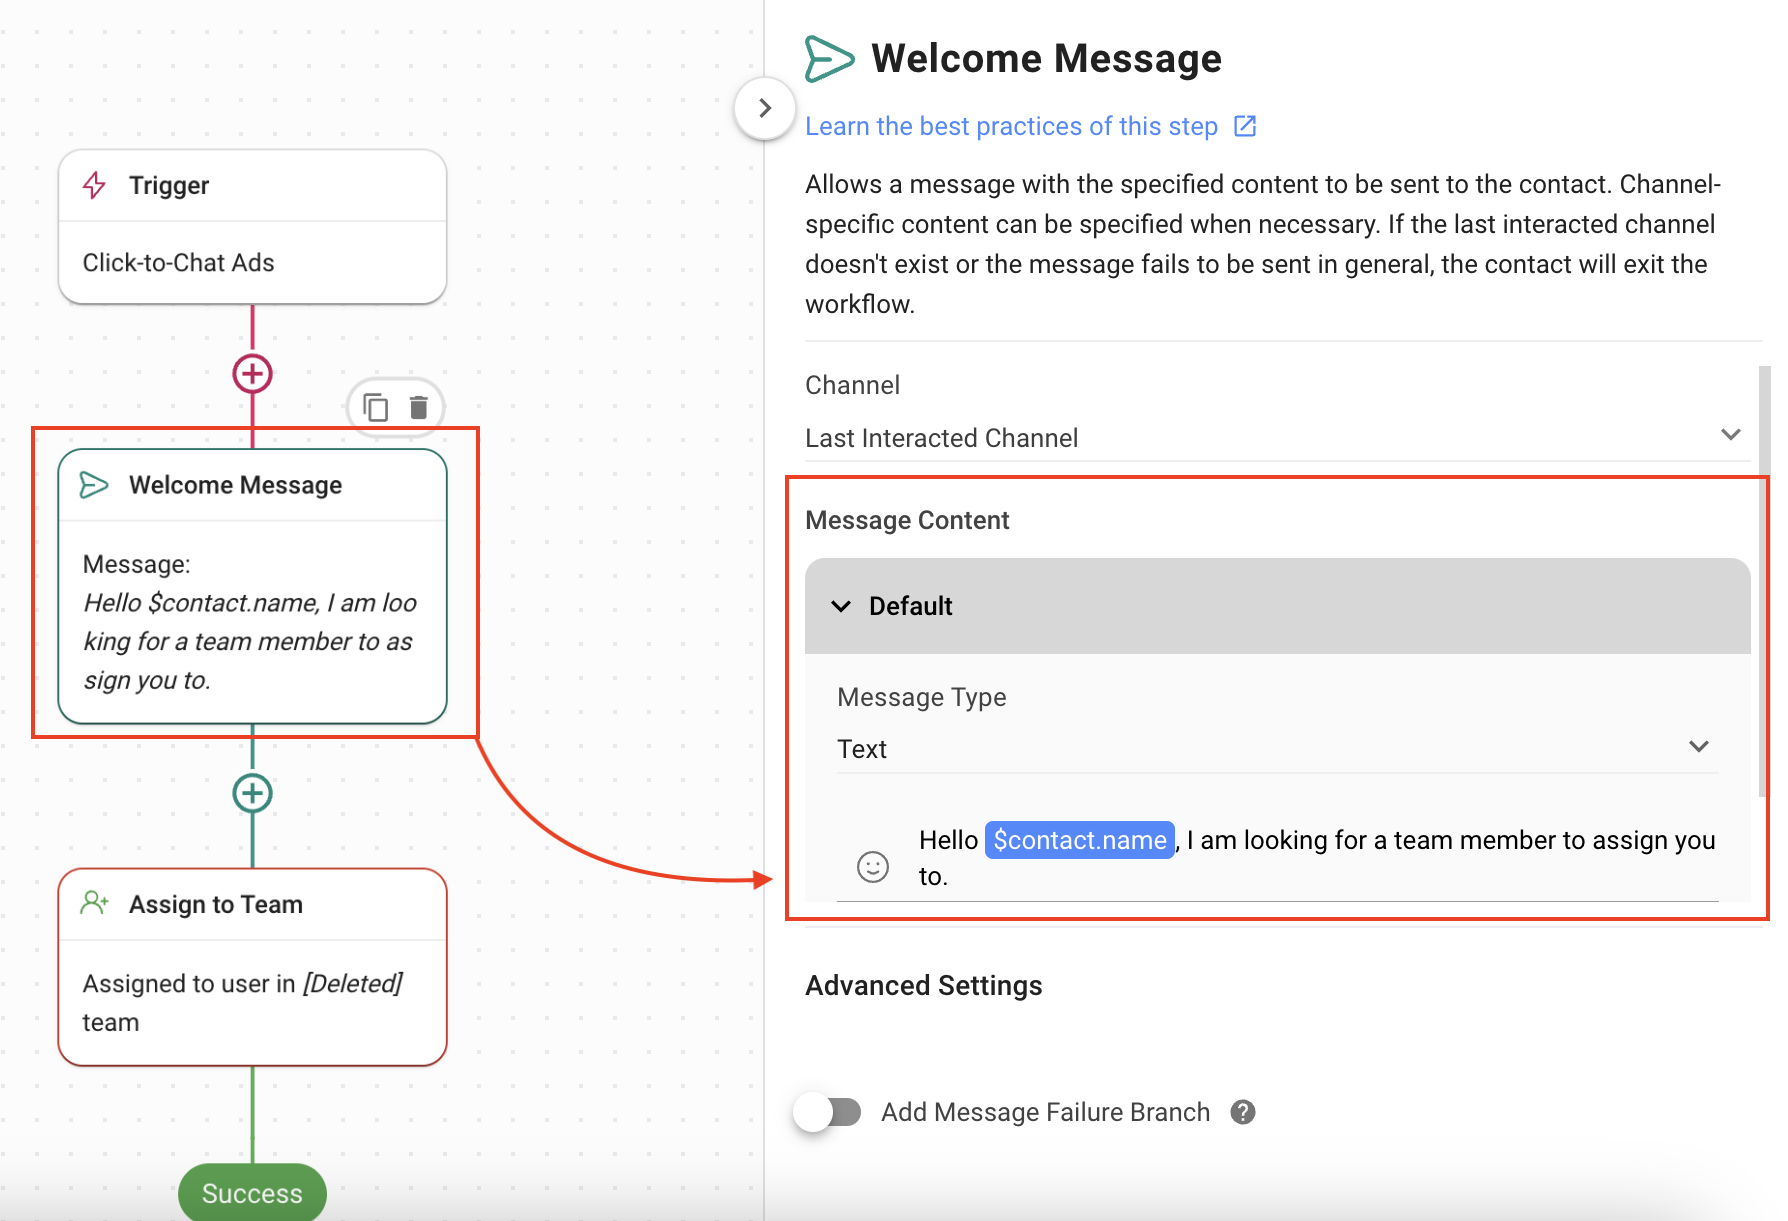
Welcome Message: Provides a standard greeting that acts as an immediate response to your Contact, informing them that an agent will be assigned to them soon. To achieve this, the following values have been set in the Send a Message Step:
Channel = Last interacted channel has been selected so the welcome message is automatically sent on the channel that the Contact is coming from.
Message type = Text has been set.
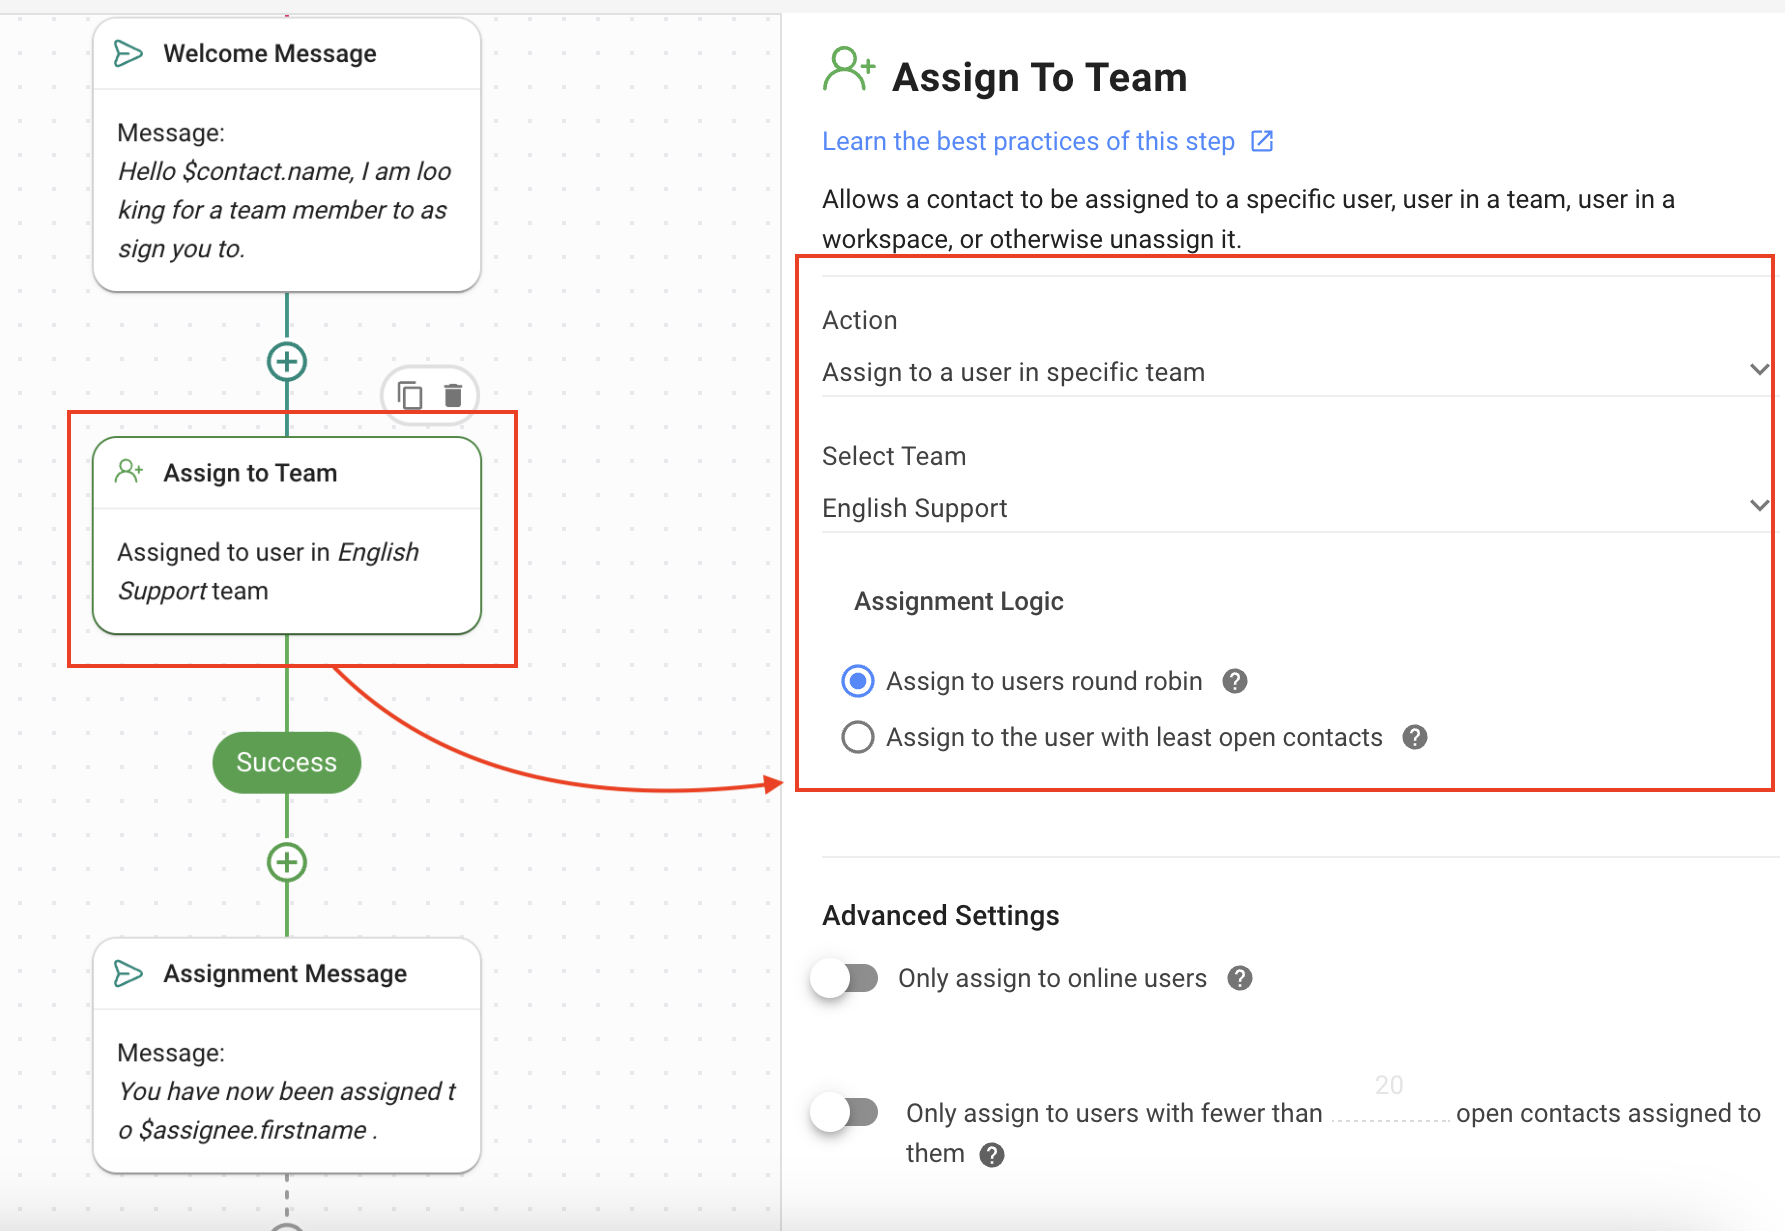
Assign to Team: Assigns the Contact to a team. To achieve this, the following values have been set in the Assign to Step:
Action = Assign to a user in specific team to assign the Contact to an agent in the selected team.
The relevant team can be selected from the Select Team dropdown list.
Assignment Logic = Assign to users round robin, the default setting has not been changed.
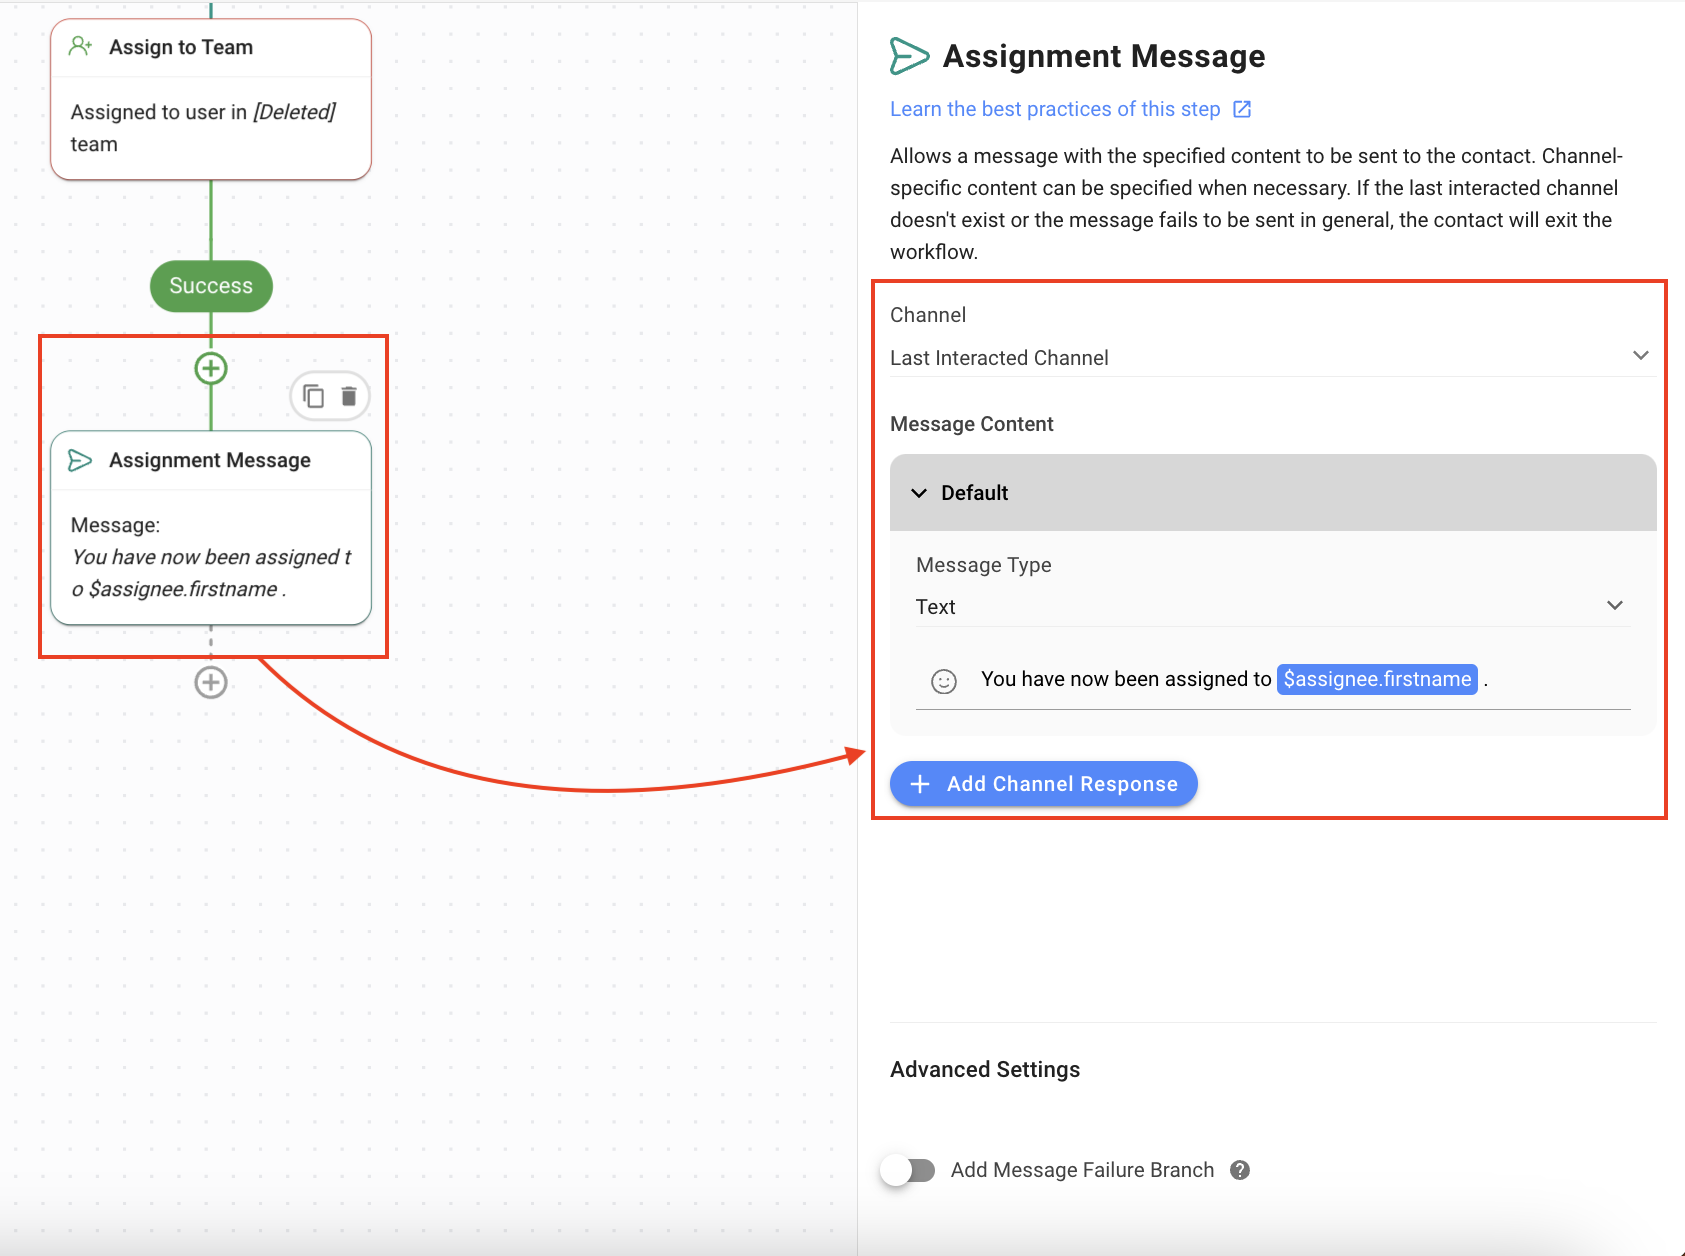
Assignment Message: Sends the Contact a message specifying which agent has been assigned to them. To achieve this, the following values have been set in the Send a Message Step:
Channel = Last interacted channel has been selected so the welcome message is automatically sent on the channel that the Contact is coming from.
Message type = Text has been set.
Contacts coming via CTC Ads have been assigned to agents automatically.


Verwandte Artikel 👩💻

