Adding a web chat widget to your Wix website is a quick and easy process. It does not require any coding skills or technical knowledge.
In order to install a web chat widget on Wix, you will need the following:
Access to your Wix account.
A code snippet for your web chat widget.
If you don't have a code snippet already, you will generate one when creating a respond.io Website Chat Widget or using the Facebook Chat Plugin for Facebook Messenger.
If you have the channels already connected on the respond.io platform and you need to retrieve the generated code snippet, follow the instructions here.
Step 1: Sign in to your Wix Account.
Step 2: Navigate to Settings > Advanced Settings > Tracking & Analytics > + New Tool > Custom.

Step 3: Add the code snippet generated from the respond.io platform to the paste the code snippet here field.
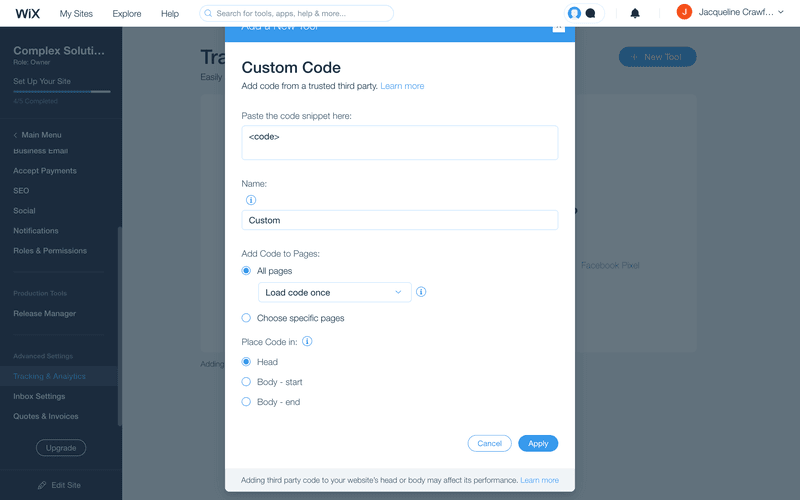
Step 4: Complete the form as required and click Apply to save the changes.
If you have multiple domains, an additional option Select the relevant domain, will appear in the Custom Code Form.
The chat widget is now active on your website!


Related articles 👩💻

